
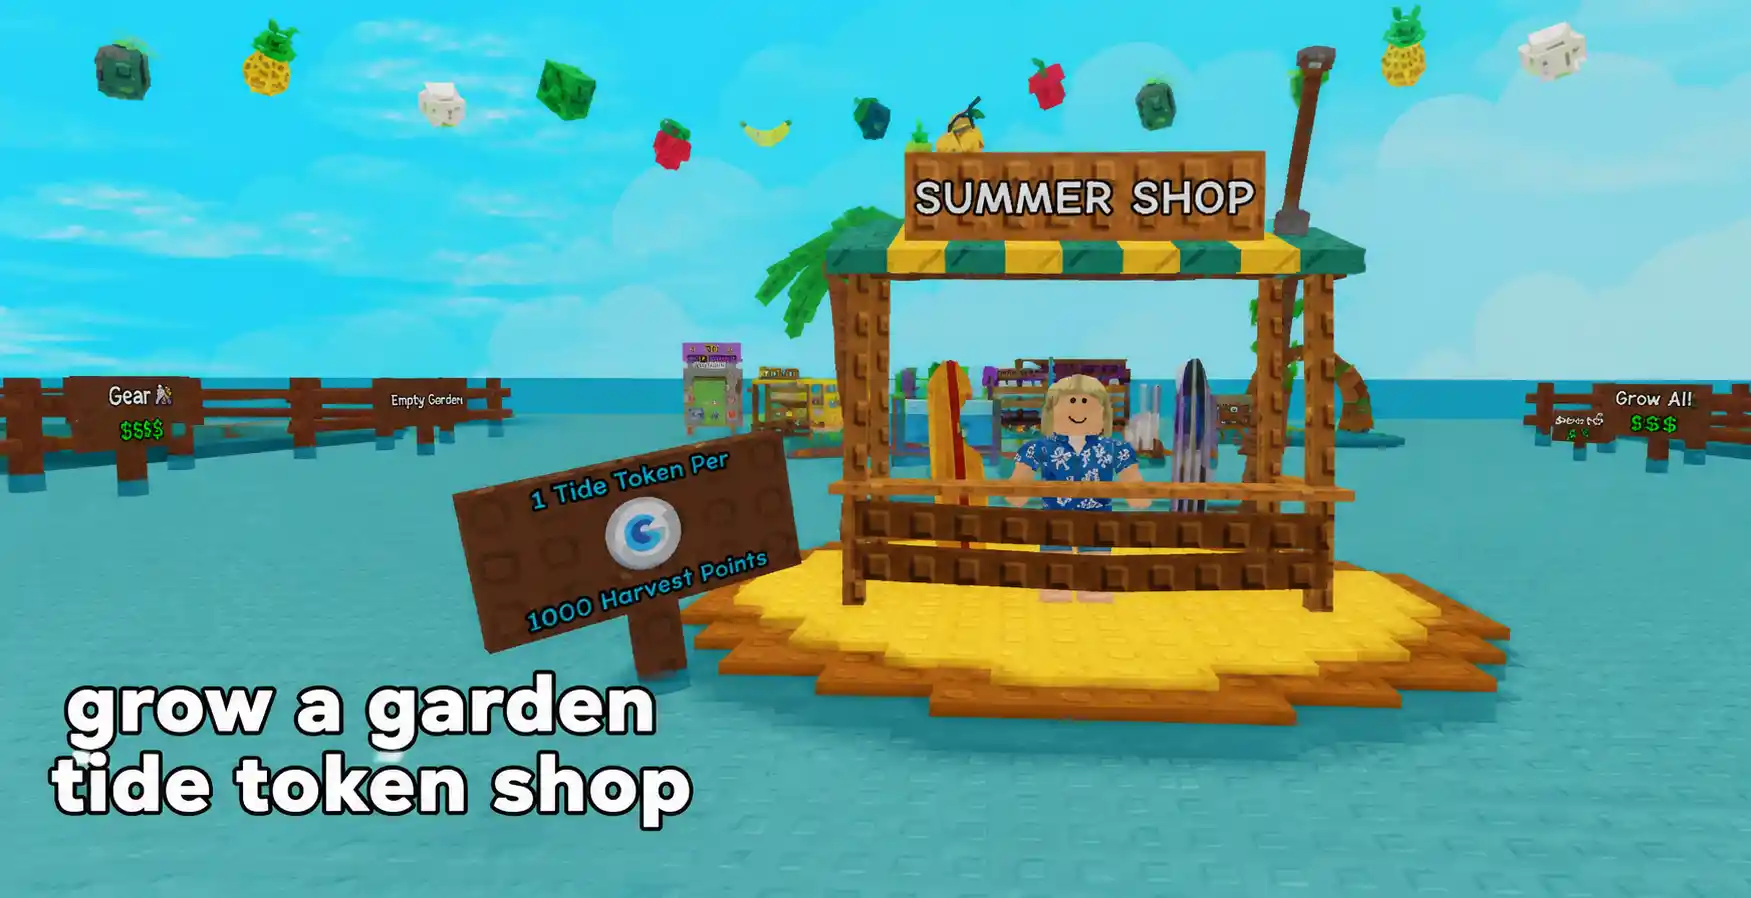

A new currency has quietly taken over the beach corner of Grow a Garden, and most players still don’t know what to do with it. Tide Tokens started popping up in inventories the moment the second week of the Summer Event rolled around, and the shop attached to them refreshes so fast that half the community is buying blind. That’s the gap this guide closes.
Below is a complete, verified breakdown of the Tide Token Shop — how the currency is earned, every item currently sold, the exact prices in tokens versus Robux, and which purchases are actually worth your grind time.
What Is the Tide Token Shop?
The Tide Token Shop is a rotating seasonal storefront tied to the High Tide Harvest Event, accessible through the in-game Summer Shop menu. Unlike the standard Seed Shop or Gear Shop, this one runs on a 15-minute refresh cycle, meaning the selection of seeds, pets, and decorations changes constantly throughout the event window. Everything inside is tagged as limited-time, so once the Summer Event wraps up, the shop and its exclusive stock disappear along with it — a pattern the game has followed with nearly every seasonal rotation, including the earlier Summer Camp Event.
The shop exists purely to give Tide Tokens somewhere to go. You earn the currency by farming, then spend it here on cosmetics, pets, and crop packs before the timer runs out. It’s a fairly small addition on paper, but the pricing and drop-rate structure underneath it is more layered than it first appears.
How to Earn Tide Tokens
Tide Tokens can only be farmed one way: by actively participating in the High Tide Harvest mechanic. Every hour, High Tide Weather triggers and stays active for 10 minutes. During that window, players submit crops carrying either the Summer trait or the Tidal mutation to earn Harvest Points, which then convert into tokens.
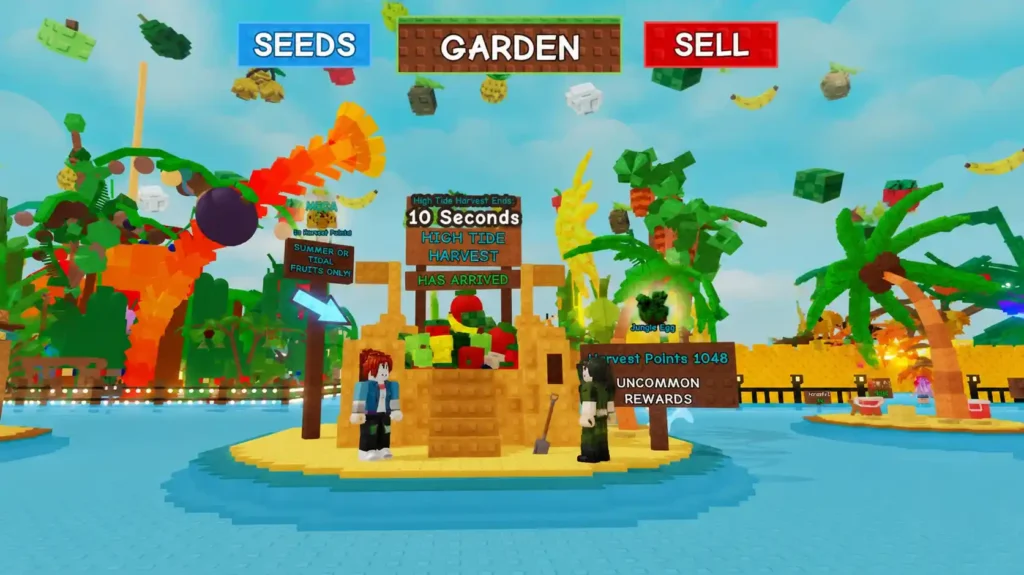
Harvest Points and the High Tide Weather Cycle
Not every crop earns the same amount. The points system is weighted around three factors:
- Crop rarity — higher-tier seeds generate noticeably more points per submission
- Crop weight — heavier fruit scales the reward upward
- Mutation count — stacking multiple mutations, especially the Tidal one, multiplies the payout
This is why serious farmers pair their Summer crops with weather-boosting gear before each hourly window opens, similar to the stacking strategy already covered in the site’s Weather Guide. Since the second week of the event began, the conversion rate has been locked at 1 Tide Token per 1,000 Harvest Points, and server-wide performance also plays a role — the better your whole server farms during that 10-minute burst, the higher the reward tier everyone unlocks. A single High Tide Harvest cycle can hand out as many as 35 Tide Tokens if your server hits the top threshold, so grouping up with active players genuinely moves the needle.
Grow a Garden Tide Token Shop – Full Item List & Prices
Here’s every confirmed item sold in the Tide Token Shop, along with both the token cost and the Robux/Trade Token alternative for players who’d rather skip the grind entirely.
| Item | Rarity | Tide Token Price | Robux / Trade Token Price |
| Coastal Seed Pack | Uncommon | 4 Tide Tokens | 169 |
| Summer Splash Sprinkler | Uncommon | 8 Tide Tokens | 169 |
| Sea Urchin Pet | Rare | 12 Tide Tokens | 399 |
| Tidal Crate | Rare | 6 Tide Tokens | 169 |
| Drippy Delight Seed | Legendary | 24 Tide Tokens | 399 |
| Walrus Pet | Legendary | 64 Tide Tokens | 169 |
| Large Toy | Mythical | 50 Tide Tokens | 169 |
A quick pattern worth noticing: the Walrus Pet and Large Toy are actually cheaper in Robux than several lower-rarity items, which tells you the developers expect most of the token economy to come from active farming rather than spending. If you’re patient, grinding is clearly the intended (and cheaper) route.
Coastal Seed Pack – Full Odds Breakdown

The Coastal Seed Pack is the most affordable purchase in the shop, but its value depends entirely on what it rolls. Here’s the confirmed drop table:
| Seed | Drop Rate |
| Sunshade Flower | 40% |
| Beach Ball Cactus | 25% |
| Sand Pail Shrub | 20% |
| Pool Noodle | 10% |
| Sun Fruit | 4.5% |
| Shark Splash | 0.5% |
Most of the pool skews toward common summer crops, so treat this pack as a volume play — buying several at 4 tokens apiece to chase the rare Shark Splash is more realistic than expecting one lucky pull. It pairs well with the crop-value strategies already outlined in the Best Seeds Guide.
Tidal Crate – Decoration Drop Rates

The Tidal Crate doesn’t give seeds or pets — it’s purely cosmetic, rewarding one random decoration per open:
| Decoration | Drop Rate |
| Tiki Torch | 25% |
| Summer Drinks | 25% |
| Beach Tube | 25% |
| Beach Chair Statue | 12.5% |
| Flamingo Tube | 8.75% |
| Tidal Wave | 3.75% |
None of these decorations affect gameplay directly, but they’re worth grabbing if you’re building a beach-themed layout. Just don’t confuse the Tiki Torch decoration with the standalone Tiki Totem item — the Totem is a separate, functional piece that actively mutates nearby fruit, while the Torch from this crate is purely visual.
Sea Urchin vs Walrus: Which Pet Should You Buy First?
Both event pets have niche passives, and picking the right one first depends on what stage of the event you’re in.
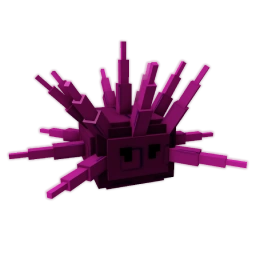
Sea Urchin (Rare, 12 tokens) carries the Urchin Searchin passive — from time to time, it converts a fruit carrying at least two mutations into bonus experience for a random pet in your garden. It’s cheap, and if you’re actively stacking mutations on Summer crops (the same crops you’re already using for Harvest Points), it pays for itself in pet leveling speed alone.

Walrus (Legendary, 64 tokens) runs the Blubber Forager passive, occasionally granting a random piece of gear or applying a Summer-type mutation directly to one of your fruits. It’s the pricier pick, but a passive that can hand you a free mutation effectively increases the value of every future High Tide Harvest submission — meaning it partially pays for its own token cost over time.
If you’re still early in the event and short on tokens, grab the Sea Urchin first for the cheap EXP boost. Once you’re farming comfortably and stacking a token surplus, the Walrus becomes the better long-term investment, especially if you’re also tracking pet synergy through the site’s Pet Combos breakdown.
Best Way to Spend Your Tide Tokens

Given the shop refreshes every 15 minutes and stock is limited-time, here’s a sensible priority order based on cost-efficiency and long-term value:
- Sea Urchin Pet – cheapest passive-generating pet, pays off almost immediately
- Coastal Seed Pack – low-cost, worth stacking for the rare Shark Splash chase
- Tidal Crate – grab a few once your farming setup is stable, purely cosmetic upside
- Summer Splash Sprinkler – solid mid-tier utility for maintaining Tidal mutations
- Walrus Pet – save tokens for this once your economy is stable
- Drippy Delight Seed – a Legendary crop worth prioritizing if your farm layout has room
- Large Toy – the priciest item, best saved for last once core pets and crops are secured
This order assumes you’re farming tokens actively rather than buying with Robux. If Sheckles and real-money spending aren’t a concern, jumping straight to the Walrus and Large Toy is fine, but most players will get more long-term value out of the cheaper items first.
What Changed After the Summer Part 3 Update
The most recent update, Summer Part 3, expanded the Tide Token Shop’s rotation alongside the new Chest Conquest PvP event. The shop’s core mechanics — the 15-minute refresh, the token-to-Robux pricing split, and the existing item pool — remain unchanged for now, but the added competitive layer from Chest Conquest gives players another route to farm event currency alongside the standard Harvest Point grind. Expect the shop’s stock to keep expanding in small waves as the developers push further Summer content, in line with how the High Tide Harvest Event has evolved since it first launched.
Is the Tide Token Shop Worth Grinding For?
For anyone who’s already active during the Summer Event, yes — the token-to-Robux comparison alone makes farming the clearly cheaper path, and the Sea Urchin and Walrus passives both feed back into the same mutation-stacking loop that drives Sheckle income elsewhere in the game. If money-making is your main focus rather than event completion, it’s still worth a few hours per day; the passive gear and mutation drops compound nicely with strategies from the Money-Making Guide. Just remember this shop is tied to a limited event window, so don’t sit on unused Tide Tokens — spend them before the Summer Event closes, because unlike Sheckles or Trade Tokens, they won’t carry over once the season ends.
Frequently Asked Questions

Grow a Garden High Tide Harvest Event Guide (2026): New Seeds, Pets, Tiki Totem & Team Rewards Explained
Read Guide
Grow a Garden Tidal Mutation Guide (2026): Best Way to Get It, What It Does, and Why Every Serious Farmer Wants It
Read Guide
Grow a Garden Tiki Totem Guide (2026): Ability, Price & How to Get One
Read Guide
Grow a Garden Coastal Egg Guide (2026): All Pets, Drop Rates, Price & Is It Worth Opening?
Read Guide
Tidal Orca in Grow a Garden (2026) Everything You Need to Know (Value, Ability, How to Get It)
Read Guide
Grow a Garden Chest Conquest Guide: Summer Part 3 Update Patch Notes (2026)
Read Guide