


If you have been sitting on a Level 50 pet since the Harvest Moon Event first launched, you already have everything the Moon Machine needs — you just haven’t fed it through yet. Update 1.63.0 turned that machine into the single most talked-about station in the current event, mostly because of one number: a 2.5% chance at the rarest Moon Mutation in the game.
Here’s exactly how the machine works, what it costs you, and how to get the most out of every cycle you run.
What the Moon Machine Actually Does
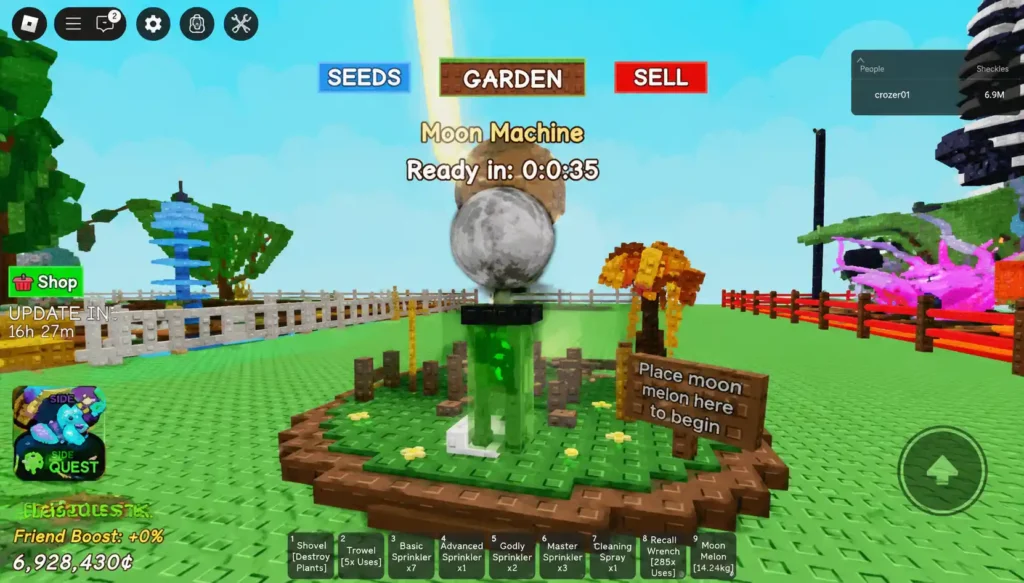
The Moon Machine is a pet mutation station added with Harvest Moon Part 3, and its only job is converting eligible companions into one of four new Moon Mutation variants. It doesn’t touch crops, seeds, or gear — this is strictly a pet-focused system, separate from crop-side mechanics like the Moonbeam mutation you get from summoning the Harvest Moon itself. Think of it as a second, event-exclusive layer sitting on top of the game’s regular Pet Mutation Machine, but with its own eligibility rules and its own currency.
The Level 50 Requirement Nobody Warns You About
Before you drag a pet anywhere near the machine, check its age. The Moon Machine only accepts pets that are Level 50 or higher — anything below that threshold gets rejected outright, with no partial credit or reduced-cost workaround. This mirrors the same eligibility floor used by the standard Pet Mutation Machine, so if you’ve already been grinding pet experience for that system, your roster is likely closer to ready than you think.
If your best companions haven’t hit Level 50 yet, prioritizing feeding routines and XP-boosting gear before you touch the Moon Machine will save you a wasted trip. Pet leveling has no shortcut here — there’s no coin payment that lets you skip the age requirement.
Step-by-Step: Running a Pet Through the Moon Machine
- Confirm your pet is Level 50+. Check its age stat before interacting with the machine; sub-50 pets are turned away instantly.
- Check your Moon Coin balance. The machine draws from the same currency pool used for Moon Crafting and the Moon Sell Stand, so know what you have going in.
- Place the eligible pet into the machine and confirm the cycle. This starts the processing timer.
- Wait out the full processing time. There’s currently no legitimate way to rush this — more on that below.
- Collect your pet once processing finishes and check which of the four Moon Mutations it received.
Moon Coins: What a Machine Cycle Actually Costs You
Every run through the Moon Machine costs Moon Coins, the same event currency you’ve been earning since the Harvest Moon Event first went live — from Moonbeam mutation sales at the Moon Sell Stand, Wise Owl completions, and mini achievement rewards. Because Moon Coins also fund Moon Crafting recipes, it’s worth deciding upfront whether you’re prioritizing Moon Machine pulls or saving toward a crafting goal, since spending on both at once tends to stall progress on each.
All 4 Moon Mutations, Ranked
Feeding a pet into the Moon Machine returns one of four outcomes, assigned randomly on every cycle:
| Moon Mutation | Rarity Tier | Notes |
| Bountiful | Common | Base-tier machine output |
| Threshing | Common | Base-tier machine output |
| Lunarbound | Uncommon | Solid mid-tier pull, clearly better than the two common results |
| Starry | Ultra-Rare (2.5%) | The chase mutation of the entire Moon Machine system |
Chasing the 2.5% Starry Pull

There’s no trick to landing a Starry Mutation — it’s a flat 2.5% roll on every single cycle, independent of your previous results. The only real lever you can pull is volume: the more Level 50+ pets you cycle through, the more independent attempts you get at that percentage. As of this update, there’s no confirmed pity system or guaranteed-pull mechanic tied to repeated failures, so don’t treat a string of Bountiful or Threshing results as “building toward” a Starry pull — every cycle resets to the same odds.
Why the “Golem Method” Timer Skip No Longer Works
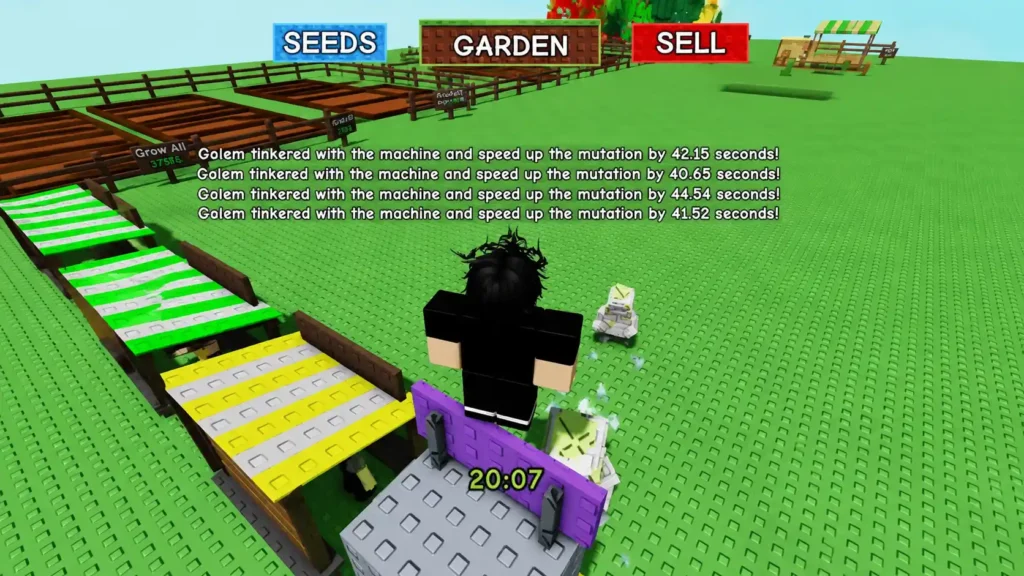
If you’ve seen older posts claiming you could bypass the Moon Machine’s processing wait entirely, that loophole — known among players as the Golem Method — has been officially patched as part of Update 1.63.0. There is currently no legitimate way to force a cycle through instantly, so budget your play sessions around the full wait time rather than assuming a shortcut still exists.
Moon Machine vs. the Standard Pet Mutation Machine
Both machines share the Level 50 entry requirement, but they aren’t interchangeable. The regular Pet Mutation Machine applies its own standing pool of mutations year-round, while the Moon Machine’s four outcomes are exclusive to the Harvest Moon storyline and paid for in Moon Coins rather than Sheckles. Based on how the game’s pet system generally handles mutations, only one mutation can be active on a pet at a time — so a pet already carrying a mutation from the standard machine would need that slot cleared before the Moon Machine’s result can take effect.
Best Pets to Feed Into the Moon Machine First
Since every cycle is an independent roll at the same odds, there’s no pet that mathematically improves your Starry chance. The smarter approach is prioritizing pets you’d actually use with a Moon Mutation attached — companions already in your active loadout, rather than low-priority pets sitting in storage. Running your strongest, most-used pets through first means any Lunarbound or Starry result immediately upgrades a slot you’re already relying on.
Smart Ways to Stack Moon Coins Before You Start Cycling
Because the Moon Machine and Moon Crafting pull from the same balance, players who farmed Moon Coins aggressively during earlier phases — including anyone running Moongrain Meadow setups back in Part 2 — already have a head start. If your coin balance is thin, keep the Moon Sell Stand loop running alongside your regular harvest cycle rather than pausing it to focus on Moon Machine attempts; the two income sources stack naturally over a normal play session.
The Moon Machine isn’t going anywhere as long as the Harvest Moon storyline stays active, so there’s no urgency to burn your entire coin balance in one sitting. Treat each cycle as a long-term grind rather than a race, and the Starry pull will come with volume over time.
Frequently Asked Questions

Harvest Moon Part 3 Guide: Moon Crafting & the Harvest Golem Explained
Read Guide
Harvest Moon Event 2026: Complete Guide to Moon Coins, Pets & Milestones
Read Guide
Pet Mutation Machine: Cost, Location & Drop Rates
Read Guide
Harvest Moon Part 2: Wise Owl, Moon Chests & Season Pass 7
Read Guide
Moongrain Meadow: Price, Rarity & Moonbeam Passive
Read Guide