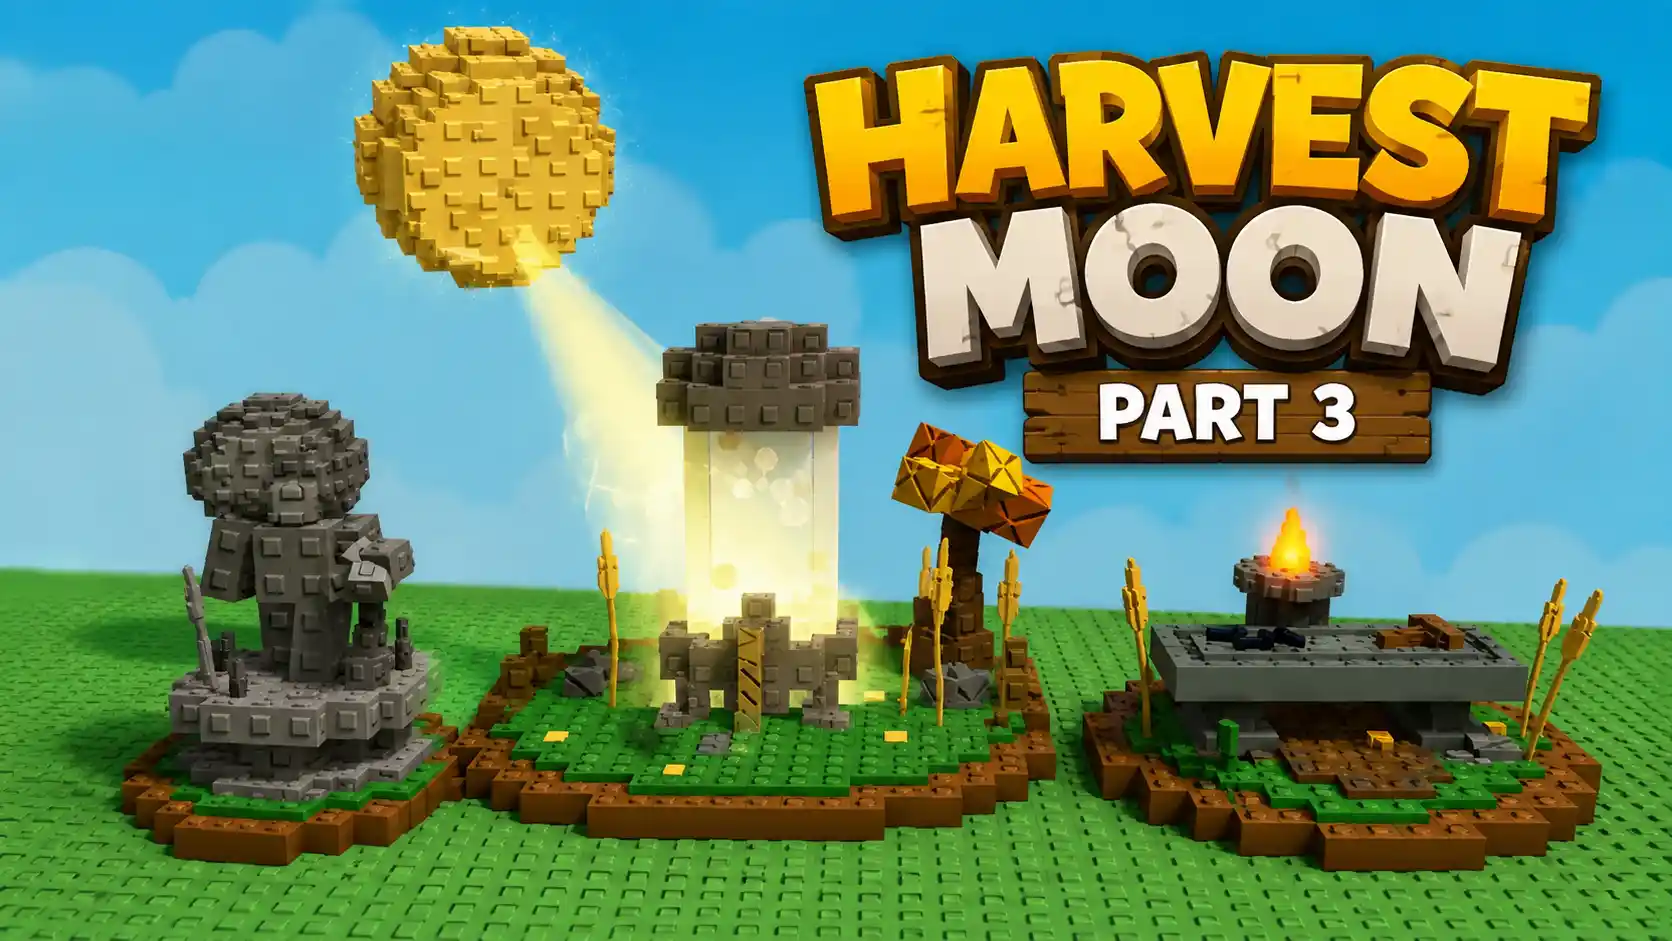

Two weeks of lantern light and Moonbeam mutations weren’t enough, apparently. Grow a Garden just pushed out Update 1.63.0, and instead of quietly wrapping up the Harvest Moon storyline, the developers handed players an entirely new pet system and a crafting table that changes how the event’s rewards actually get used. This is the third act of the event, and unlike the first two phases, it isn’t really about farming a weather cycle anymore — it’s about what you do with the pets and coins you’ve already stockpiled.
If you’ve been sitting on a pile of Moon Coins with nothing new to spend them on, that changes today. Here’s a full, patch-accurate breakdown of the Roblox Grow a Garden Update 1.63.0 patch notes, what the Moon Machine actually does, how Moon Crafting works, and exactly what it takes to build the new Harvest Golem.
What’s Actually New in Update 1.63.0
Harvest Moon Part 3 is built around two connected systems rather than one standalone gimmick. The first is the Moon Machine, a pet-focused station that converts eligible companions into rarer variants. The second is Moon Crafting, a dedicated crafting table that turns Moon Coins and event materials into seeds, gear, and pets that don’t exist anywhere else in the shop rotation. Layered on top of both are new Harvest Moon-themed mini achievements, a batch of new plants and cosmetics, and a handful of quality-of-life fixes that quietly patch out a shortcut players had been relying on since Part 2.
None of this replaces the original event loop. Summoning the Harvest Moon, farming the Moonbeam mutation, and cashing fruit in at the Moon Sell Stand still work exactly as they did during the Harvest Moon Event launch, and the Wise Owl introduced in Harvest Moon Part 2 is still active. Part 3 just gives all the Moon Coins you’ve been banking somewhere new to go.
Tracking Your Progress With the Harvest Moon Event Statue
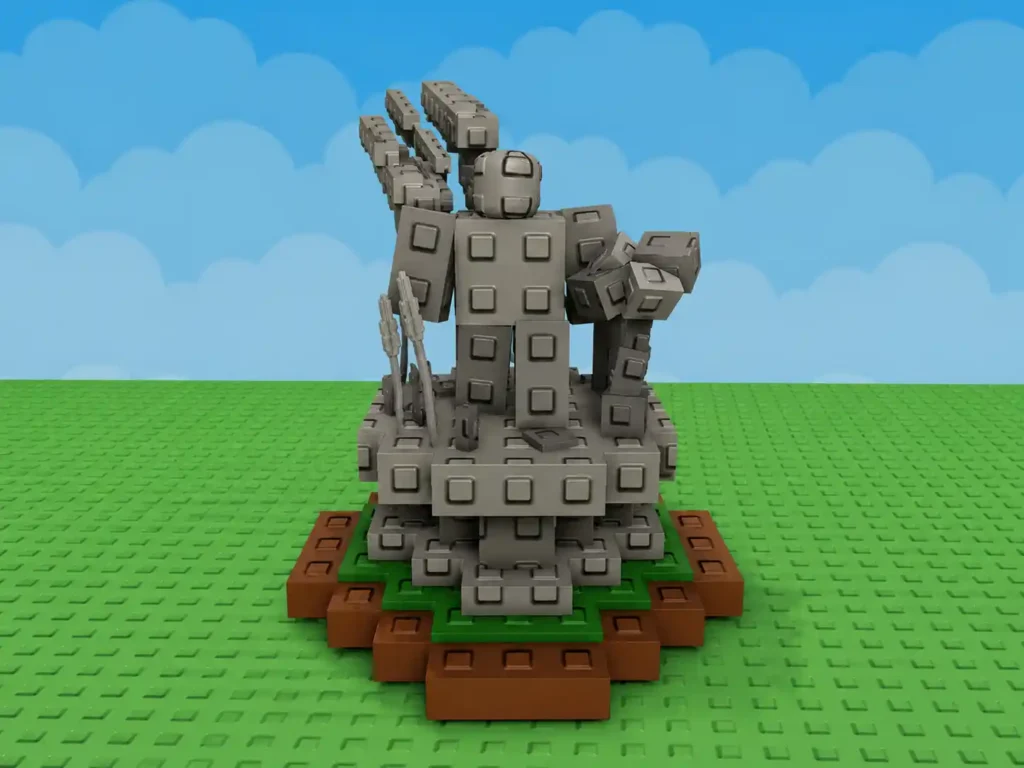
A new Harvest Moon Event Statue was added alongside the update, and it’s worth checking before you touch anything else. Interacting with the statue shows a running tally of your event achievements and unlocked rewards, so you don’t have to guess whether a mini achievement actually registered. Given how many moving parts Part 3 introduces — Moon Machine mutations, crafting recipe unlocks, and mini achievement rewards all tracked separately — the statue is the fastest way to confirm your progress without digging through menus.
How to Use the Moon Machine in Grow a Garden
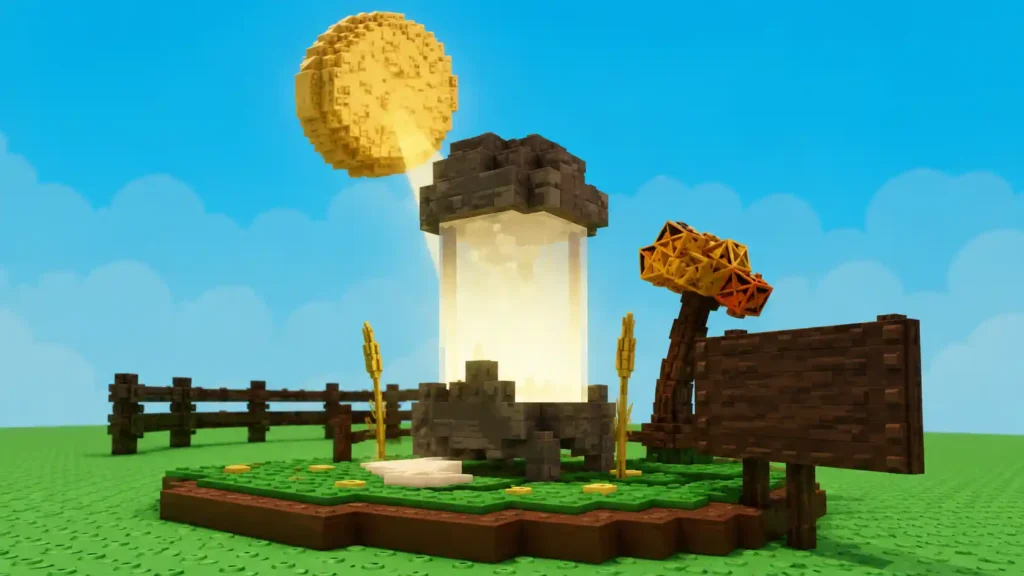
The Moon Machine is the headline addition, and understanding how to use the Moon Machine in Grow a Garden comes down to three requirements: pet level, currency, and patience.
The Level 50 Requirement
The machine only accepts pets that are Level 50 or higher. Anything below that threshold gets rejected outright, which mirrors the eligibility rule used by the game’s standard Pet Mutation Machine. If your best companions haven’t hit that age yet, prioritizing pet experience gear and feeding routines before you touch the Moon Machine will save you from wasting a trip.
Moon Coin Cost and the Golem Method Patch
Running a pet through the machine costs Moon Coins, the same event currency you’ve been earning from Moonbeam mutation sales and Wise Owl completions since Part 1. That’s the other reason the statue matters: crafting and mutating both draw from the same coin pool, so tracking your balance prevents you from getting stuck mid-recipe.
One important change worth flagging for returning players: the so-called “Golem Method,” a trick some players used to skip the Moon Machine’s processing timer entirely, has been officially patched in this update. There’s no legitimate way around the wait time anymore, so budget your play sessions accordingly rather than assuming you can force a mutation through instantly.
Best Moon Mutations in Grow a Garden Roblox — All 4, Ranked
Feeding a pet into the Moon Machine returns one of four possible Moon Mutations, assigned randomly. Three are relatively common; the fourth is the chase reward of the entire system.
| Moon Mutation | Rarity Tier | Notes |
| Bountiful | Common | Base-tier Moon Machine output |
| Threshing | Common | Base-tier Moon Machine output |
| Lunarbound | Uncommon | Mid-tier pull, more desirable than the first two |
| Starry | Ultra-Rare (2.5% chance) | The chase mutation of Harvest Moon Part 3 |
How to Get the Starry Mutation in Grow a Garden
If there’s one question every player is going to type into a search bar this week, it’s how to get the Starry Mutation in Grow a Garden. The honest answer is that there’s no trick to it — Starry is a random roll with a 2.5% chance per Moon Machine cycle, which puts it in the same rarity bracket as some of the game’s rarest pet variants. The only lever you can actually pull is volume: the more Level 50+ pets you cycle through the machine, the more attempts you get at that 2.5%. There’s currently no confirmed pity system or guaranteed-pull mechanic tied to repeated failures, so treat every run as an independent roll rather than something that “builds up” toward a Starry result.
Inside the Grow a Garden Moon Crafting System Guide
The second major system, Moon Crafting, is where most of your Moon Coins are actually going to end up. This is a dedicated crafting table separate from the Moon Machine, and it’s used to build both new items and reproductions of existing Harvest Moon rewards.
Recipes Unlock Through Summoning, Not Purchases
You can’t buy your way into better recipes — crafting options unlock progressively as you summon the Harvest Moon itself. Each successful summon during the event window pushes your recipe list forward, which means players who prioritized the original summoning loop back in Part 1 already have a head start heading into this phase.
Pets That Actually Help at the Crafting Table
Two specific pets change how efficient your crafting sessions are:
- Hamster dramatically cuts down active crafting time, functioning as a speed buff for anything currently in progress on the table.
- Orangutan and Patchphiloserus both carry a chance to refund materials after a successful craft, meaning the ingredients you spent occasionally return straight to your inventory instead of disappearing.
Running either refund pet alongside a Hamster is close to the most efficient setup currently available, since one shortens the wait and the other softens the material cost of repeated crafts.
Every New Craftable Item
Moon Crafting currently supports six confirmed items: Starry Strawberry, Moon Beam Radar, Wheat Crow, Wheat Cap, Harvest Melon, and the Harvest Golem — the last of which is locked behind a much steeper unlock condition than everything else on the list.
Grow a Garden Harvest Golem Recipe: How to Unlock and Craft It
The Harvest Golem is the centerpiece reward of Part 3, and getting there takes real commitment rather than a single lucky pull.
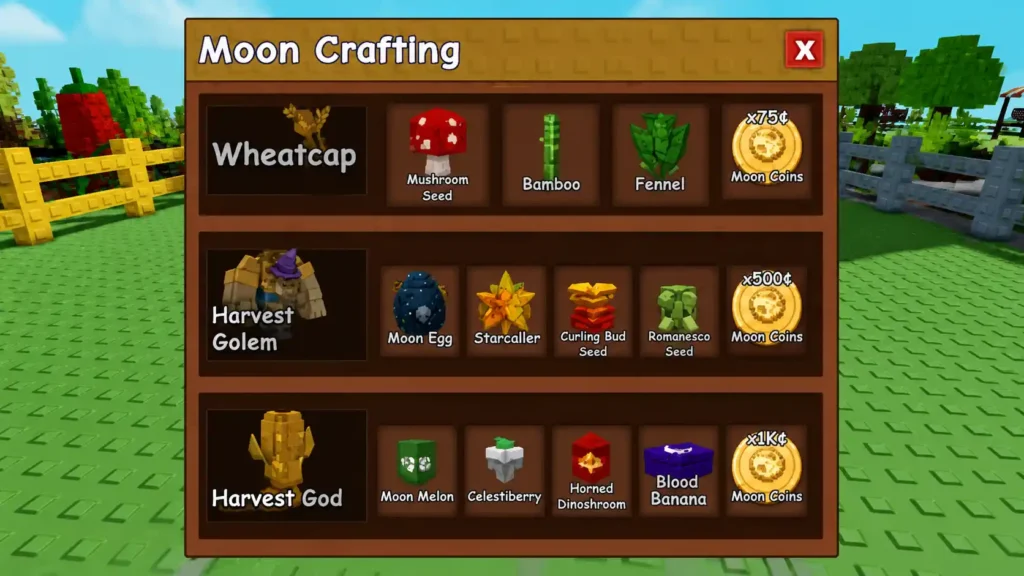
Unlocking the Recipe
The Harvest Golem’s crafting recipe doesn’t appear on the table by default. You have to summon the Harvest Moon exactly 9 times before it unlocks, which — combined with the standard 10-minute cooldown between summons — makes this a multi-session grind rather than something you knock out in one sitting.
What You Need to Craft It
| Ingredient | Quantity |
| Moon Egg | 1x |
| Mythical Egg | 1x |
| Burning Bud Seed | 1x |
| Romanesco Seed | 1x |
| Moon Coins | Required (variable) |
The Harvest Smash Ability
Once built, the Harvest Golem isn’t just a cosmetic reward — it actively works your garden. Roughly every 14 minutes and 50 seconds, it smashes the ground near a random plant within an 18.18-stud radius. That smash does three things at once: it auto-harvests every fruit in the affected area, it extends the growth timer of nearby plants by 30 minutes and 10 seconds, and each harvested fruit carries an 8.08% chance of staying on the plant afterward, effectively giving you a shot at a second harvest from the same fruit.
None of those numbers sound dramatic in isolation, but stacked together over a full offline session, the Harvest Golem functions as a low-maintenance passive income booster — closer in spirit to an idle-farming pet than a combat or speed-focused companion.
Best Order to Tackle Harvest Moon Part 3
Given how the systems interlock, the order you approach them in matters more than usual. Based on how the unlock conditions are structured, here’s the sequence that wastes the least time:
- Summon the Harvest Moon repeatedly first. Every recipe in Moon Crafting, including the Harvest Golem’s, is gated behind summon count rather than currency, so this is the one bottleneck you can’t shortcut with coins.
- Level your best pets to 50 in parallel. The Moon Machine’s level requirement doesn’t interact with your summon count at all, so there’s no reason to delay pet leveling while you’re waiting out summon cooldowns.
- Spend Moon Coins deliberately, not reflexively. Between Moon Machine mutation attempts and Moon Crafting material costs, Moon Coins get consumed fast. Decide up front whether you’re chasing a Starry Mutation or saving toward the Harvest Golem’s ingredient list, because trying to do both at once with a limited coin balance usually stalls out on both fronts.
Players who already built up a Moon Coin surplus during Moongrain Meadow farming sessions in Part 2 have a real head start here — that stockpile now has somewhere productive to go.
Where Harvest Moon Goes From Here
Grow a Garden’s seasonal events rarely end at Part 3, and given how the developers structured the recipe unlocks — deliberately leaving room for a Part 4 to slot in additional crafting tiers — it wouldn’t be surprising to see this event extend further before the calendar moves on. For a broader look at where the game’s update cycle tends to head after a multi-part event like this one, it’s worth keeping an eye on what’s coming next in Grow a Garden’s roadmap.
For now, though, the priority is clear: get your summon count up, get your pets to Level 50, and decide whether the 2.5% Starry pull or the nine-summon Harvest Golem grind is worth your Moon Coins first. According to the official Grow a Garden Harvest Moon Part 3 event page on Roblox, this is an expansion of the ongoing Harvest Moon storyline rather than a standalone drop, so anything you build now should carry forward as the event continues.
Frequently Asked Questions

Grow a Garden Harvest Moon Part 2: Wise Owl, Moon Chests & Season Pass 7 Explained
Read Guide
Grow a Garden Harvest Moon Event 2026: Moon Coins, Pets, Crops & Milestones
Read Guide
Grow a Garden Pet Mutation Machine: Cost, Location & Drop Rates
Read Guide
Grow a Garden Moongrain Meadow: Price, Rarity & Moonbeam Passive
Read Guide
How to Get the Shocked Mutation in Grow a Garden: 100x Multiplier Guide
Read Guide